Showing posts with label Square Card. Show all posts

Monday, May 24, 2010

Christmas in May

Yes I know, Christmas is a long ways away. But, since waking up to a couple inches of snow just this last Sunday. I thought it would be fitting to share this Holiday creation with you... This card was created for one of the last Paper Crafts Magazine calls, but never got picked up. So why not share, it's always a good idea to get a head start on the season. My inspiration for this card actually came from a pair of my favorite Christmas socks. They were made of the exact argyle pattern I created here on the card (using A Little Argyle by Lisa Johnson). The layout was easy, it's the same layout as the one used for the card on this post.
Created the pattern by stamping the solid argyle pattern block in Pure Poppy, used the single diamond to randomly stamp the Sweet Blush, Spring Rain & Spring Moss and then topped it off with the black linear argyle pattern block. Stamped the tree and sentiment from Winter Swirls onto a punched circle and embellish with a few True Black buttons.

Hope you enjoyed a little Christmas cheer today! Thanks for visiting and have a wonderful Tuesday!

Maile


Happy Holidays:

Wednesday, March 31, 2010

Happy Happy Birthday

Hello all! Yesterday my good friend Kim Wilson and I went shopping at IKEA, for my very first time. Wow, what a fun store and a great place to find tons of inspiration! I picked up some organization supplies, which I have desperately needed, and can't wait to get my self and supplies better organized. What are some of your favorite organization idea?!

Ok, for today's card you all are going to have to take it easy on me. It's another first for me... I've finally made the plunge into the Copic craze! I picked up a few of the Copic trios from Papertrey Ink and boy are they fun. I have no idea what I am doing, but I hope with practice to improve. I kind of cheated on today's card and simply just scribbled onto each of the butterfly wings, from Butterfly Dreams. I really like the way it turned out though!
Tied some Summer Sunrise twill ribbon over the edge, attached a label from Fillable Frames #2 and a sentiment from Fillable Frames #1, then embellished with some black rhinestones.

Thanks for stopping by and hope you all have a great day!

Maile


Happy, Happy Birthday:

Wednesday, March 24, 2010

Thinking of You Beautiful Blooms II

Hello all! Thought I would pop in and share a Beautiful Blooms II card with you today... Using a springy color combo of Plum Pudding, Hawaiian Shores and Melon Berry I hand stamped pattern papers using the large and small solid blooms (from Beautiful Blooms II). Attached a row of the blooms across the front of the card and made sure to extend it over the edges. The card base measures 4 3/8"wide so that, with the extended edges the entire card measure 5" square.
Wrapped the hand stamped blooms with Melon Berry Twill and attach a sentiment frame, from Fillable Frames #2. For a different take on the sentiment frame idea, I cut off part of the frame to line it up with the edge of the card.
Hope you enjoyed and thanks for stopping by!

Maile


Thinking Of You:

Friday, March 5, 2010

Just Us Girls #23 Sponsored By Wplus9

Today's card is based off of the latest Just Us Girls Challenge, sponsored by Dawn Woleslagle of WPlus9 Design stamps. Check out the fun sketch...Up for grabs are two Wplus9 stamps sets! So stop by JUGS for the details and see what their design team has come up with, using Wplus9's stamps.

Here is my take...
Using a few of the tree top images, from the super fun Funky Foliage stamp set, I was able to create these adorable little flowers and leaves.
The sentiment is from Funky Flowers, another fun set! Used a fun color combo of Hibiscus Burst, Melon Berry, New Leaf, Kraft and Dark Chocolate. A new combo for me, since I finally got my hands on some Hibiscus Burst goodies.

Be sure to stop by Dawn's blog to see her gorgeous creation for the challenge, and for the latest on the new release coming up very soon! Also... my fellow talented Design Team members Savitri Wilder and Elise Durenberger have joined in on the JUGS fun too.

Hope you all have a great weekend!

Maile


Happy Birthday Friend:

Thursday, February 25, 2010

February PTI Blog Hop

I'd like to start off today, by sending out a huge Thank You to each and everyone of you who left me such kind and encouraging words yesterday. Definitely made for a fun day, reading what you all had to say.Now onto the February Papertrey Ink Blog Hop. This months blog hop is in honor of the PTI Design team. The challenge is to select a project they have created, use it as inspiration and recreate a project with your own spin, making it unique. I have always found the ladies of the PTI Design Team to be full of talent and have always looked up to them for inspiration. I count it as a huge blessing to be apart of such a talented team.


I fell in love with this card by Dawn McVey and as soon as I saw it, I knew I had to give it a try. I would have never come up with an idea like this on my own, wouldn't it be awesome to get inside of Dawn's head and see how her creative mind works! Here is my take...
I changed up the layout and the color combo (added Aqua Mist and used White instead of Rustic Cream). Dawns butterfly was created using a larger scaled flourish (from Fancy Flourishes) and its mirror image, I went with two smaller flourishes and the coordinating mirror images.
The Aqua Mist card base was stamped, in Versamark, with an image from Background Basics: Tin Types. Embellished the butterfly with Berry Sorbet vintage buttons (strung with yellow embroidery floss) and a Lemon Tart bow. Stamped the sentiment, from Asian Fusion on a Lemon Tart strip and trimmed the edge with scalloped scissors.

Thanks Dawn for such great inspiration and thank you for hopping by! Enjoy the Blog Hop!

Maile


Birthday Wishes:

Friday, February 19, 2010

Hello Dot Spot

Hello and happy Friday!!! Today's card uses a little Dot Spot for you... Stamped the Dot Spot images in Aqua Mist, Spring Moss & True Black, across a white cardstock square and rounded the bottom corner. Attach a Spring Moss cardstock strip along the bottom to help emphasize the simple sentiment (from Fillable Frames #1). Then mounted it all onto a True Black card base. Pretty much kept the supplies to a minimum today; just cardstock, stamps and ink.

Thanks for stopping by today, hope you have a great day and a wonderful weekend!

Maile


Hello: Card Measures 5" square

Saturday, February 13, 2010

Wplus9 Design Studio Is Now Open!

It's official... Wplu9 Design Studio is now open for business! Stop by the new store and check it out!

Today I wanted to share a fun card, using Love Birds (which is already on sale), perfect to give to a dear friend and to let them know that you are thinking of them... The set comes with two branches, which I combined to create a tree. Stamped the large branch vertically, masked it off and stamped the smaller branch off of the tree trunk. The leaves were added by stamping just the ends of the heart flowers, in Spring Moss, onto the ends of the tree branches.
This tree branch makes for a perfect bird perch. The perch was created by stamping the ends of the smaller heart flowers, with Spring Moss, on ether side of the perch. For a bit of dimension the bird, branch and heart leaves were stamped (in Spring Moss, Dark Chocolate & Plum Pudding) onto scrap cardstock, cut out and adhered with dimensional adhesive.

This really is a versatile set, check out the entire Love Birds set and see for your self what images I used to create today's card.

Thanks for stopping by today, hope you are having a great weekend!

Maile


You Make Me Happy:

Monday, February 8, 2010

Never Ending Love Song

Hello and happy Monday my friends! I have another Wplus9 Design Studio card to share with you today, showcasing the soon to be released Just A Note stamp set. The set includes an elegant yet fun flowing line of music, which I stamped on either side of the circle cut out.
The sentiment was stamped and heat embossed in white onto Pure Poppy cardstosck, then adhered under the circle cut out. Isn't that font just gorgeous, it's a perfect fit to this gorgeous set. If you haven't seen them yet, check out Dawn's creations using this set. Also, stop by Karrianne's and Elise's blogs to see their gorgeous cards using Love Birds. Then stop by Savitri's blog to see all the wonderful projects she has created.

Thanks for popping by today, hope you have a great start to your week!

Maile


Never Ending Love Song: Card Measures 4 3/4" Square
  • Stamps: Just A Note (Wplus9)
  • Ink: PTI True Black & Versamark
  • Cardstock: PTI True Black, White & Pure Poppy
  • Accessories: White Embossing Powder & Coluzzle Circle Cutter

Saturday, February 6, 2010

New Papertrey Goodies & A CPS Sketch

Hello and happy Sunday!

Lots of exciting thing are happening with Papertrey Ink over at Nicole's blog! You must stop by and check out some of the latest news! Today's announcement is, a new line of fabulous felt made from %100 wool and available in Papertrey's exclusive color spectrum! The second announcement of the day is, Papertrey's sponsoring the latest CPS sketch challenge. The latest challenge, over at Nichole's blog, is to use their sketch and to incorporate some felt. Some of us PTI girls are playing along as well... Here is a sneak peek of the soon to be released (this February) Spot Dot stamp set. Stamped the dotted circle in Raspberry Fizz & Aqua Mist onto cardstock squares, cut them in half and adhered halves together. The sentiment (from Shapes by Design) was then stamped in True Black.
The flower was hand cut from the new black felt, stitched a button onto the center and then attached to the stamped circle.

Be sure to stop by the CPS blog , check out the sketch and take a peek at a few of the new sets!

Thanks for stopping by and have a wonderful weekend!

Maile


Smile: (All PTI unless noted)

Funky Flowers

Hello friends, hope you are having a great weekend! I got my Wplus9 stamps the other day and was finally able to play. These stamps are great! I am so in love with the images, just you wait! Today I get to showcase Funky Flowers (along with Dawn, the creator of these stamps), which is my favorite set out of the four being released (very soon).Using a couple of the flower top images and some versamark on aqua mist cardstock, I was able to create my own hand stamped pattern paper. I love the results!
The set comes with a small grouping of flowers, which I stamped multiple times along a white cardstock strip, in black. Stamped the flowers again on berry sorbet cardstock and hand cut the flower tops, attached them using dimensional adhesive and embellished with black rhinestones. Finished the card with "Freind".
Be sure to head on over to Dawn's and Karrianne's blog today, they have more Wplus9 goodies to share too! Hope you all have a great Saturday!
Maile
Freind:
  • Stamps: Funky Flowers (Wplus9)
  • Ink: Versamark, True Black (PTI)
  • Cardstock: Aqua Mist & White (PTI)
  • Accessories: KaiserCraft Black Rhinestones and Corner Rounder

Tuesday, January 26, 2010

Sending You A Huge

Hello all!!! It's been a busy day for me today. Just wanted to pop in and share some great news with you... A very talented friend of mine is starting a new venture and creating her very own line of stamps. So, stop by and check it out here.

Now onto the card for the day...
This color combo of Berry Sorbet, Lemon Tart, Kraft and White just seem so creamy and yummy to me. What do you think of it? The flourish, from Turning A New Leaf, is stamped twice in brown onto yellow cardstock, rounded the corners and layered over a white block with dimensional adhesive.
Isn't that sentiment just the cutest little phrase? The main part of the sentiment (from Big & Bold Wishes) was stamped onto berry sorbet cardstock, the rest of the sentiment was stamped onto a small white cardstock strip and attach with dimensional adhesive. Finished the card off with two berry sorbet ribbon tabs (one twill and the other grosgrain) and some super cute buttons.

I will try to have the CHA Super Show pictures for you tomorrow. I hope you all are having a great week!

Maile


Sending You A Hug: (All PTI unless noted)
  • Stamps: Turning A New Leaf & Big & Bold Wishes
  • Ink: Dark Chocolate
  • Cardstock: Kraft, White, Berry Sorbet & Lemon Tart
  • Accessories: Dark Chocolate Vintage Buttons, DMC Floss & Corner Rounder

Monday, January 25, 2010

New Goodies from the Super Show

Hello my dear friends. The CHA Super Show was a blast! I met so many wonderful people and bought a few new goodies. I hope to have some pictures of everyone I met posted soon, but for now here is a card created with some new supplies... I stamped the circle image, from Outside The Box, in SEI Ocean Deep ink. Tina (Travelingmama) was the one who told me about these SEI Chalk Ink Blocks at the Super Show, they are great! So I picked up a few of those at $1.50 each.
The circles were stamped onto 1 inch squares, arranged and attached with dimensional adhesive. The sentiment is from the same set, just left off a square and stamped it directly to the card base. Since this is such a simple card, stamping the sentiment this way helps draw your eye across the card and really catches your attention.

I hope you all had a great weekend. Thanks for visiting me today, have a great week!

Maile


Breath: Card Measures 4 1/2" Square
  • Stamps: Outside The Box (Schlosser Design)
  • Ink: Ocean Deep (SEI Chalk Ink Block)
  • Cardstock: White (PTI)

Friday, January 1, 2010

The New Embellish Magazine Design Team

Hello and Happy New Year my friends!!! Boy, have I got some exciting news to kick this new year off with. It's been very hard to keep under wraps, but now I can share! Along with starting a new year, I am starting a new venture in my life. I am taking part in my first ever Design Team with Embellish Magazine, and am working with some of the most talented ladies in the business:

What a blessing and honor it has been to be given this opportunity (thank you Ashley!), and to get to know these wonderful ladies better.

So please join us, in participating in the new and first Embellish Color Challenge of this brand spanking New Year. Which is sponsored by The Cutting Cafe, a wonderful resource for Printable Stamps and Cutting Files.

So here is my first creation as a Design Team Member (Woo-Hoo!)... The first step, print the I Love You Background, on red cardstock and attach it to a red card base. Using dimensional adhesive, attach a heart die cut. Creating my own heart die cut was a breeze! All I did was cut a square from white cardstock, round the corners, then carefully placed my Cuttlebug Concentric Heart Die precisely where I wanted it and ran it through my CB machine.
Adhered a pink "Love", from All About Valentine's Day, and embellished with black buttons.

I can not wait to see what you all create!

I am so excited about sharing more of my Embellish Challenge creations with you over this next year! Thanks for stopping by and for sharing in my excitement! Hope you have a blessed year!

Maile


Love You:

  • Printable Stamps: The Cutting Cafe
  • Cardstock: Pure Poppy, White & Sweet Blush
  • Accessories: PTI Black Vintage Buttons, Cuttlebug Concenteric Hearts Die, Corner Rounder

Card Measures: 4 1/4" Square

Friday, December 11, 2009

Enjoy The Wild Ride

Hello all and happy Friday! Boy have things been really quiet around here (the good old blog). The holidays do make thing busy but getting sick doesn't help. Forgive me for not posting or sharing much these days, I've been sick with a cold since Sunday and I am still not completely well. This cold just keeps lingering on. I took my first trip into town today, since getting sick, and I am tuckered out.

Anyways enough about that, I'll move on to the card... This bicycle image is on of my favorites from the Everyday Button Bits Set and it pairs so well with this sentiment. I thought I would go ahead and create one wild ride for this bike down a hill. This would be a fun card to give some one a smile, when things really do get wild. The hill was created by cutting a slop from ripe avocado and spring moss cardstocks, stamping the spring moss cardstock with a background from Background Basics: Retro, then distressing the edges.
The sentiment was stamped above a button tied to some spring rain twill ribbon. Then everything was attached to a kraft cardstock base. I love kraft cardstock, it goes with just about anything! Don't you think?

Well, I am going to put my son down for a nap now and maybe take one my self, hehe. Thanks for stopping by today and hope you have a wonderful weekend.

Maile


Enjoy The Ride: (All PTI unless noted)
  • Stamps: Everyday Button Bits & Background Basics: Retro
  • Ink: Spring Moss, Dark Chocolate & Versamark
  • Cardstock: Kraft, White, Ripe Avocado & Spring Moss
  • Accessories: Spring Rain Twill Ribbon, Spring Rain & Dark Chocolate Vintage Buttons, DMC Embroidery Floss, Close To My Heart Edge Distresser

Monday, November 30, 2009

Merry Christmas & A Happy New Year

Hi there! Hope you all had a wonderful and blessed Thanksgiving Holiday! Mine was very busy but I truly enjoyed it. So now getting back into the swing of things, here is a card I created based on the Fall To Layout #69... 
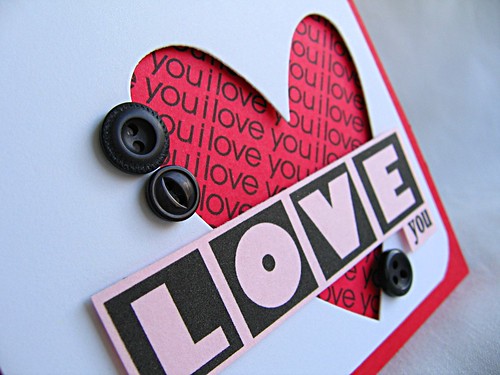
The leaves from PTI Beautiful Blooms were stamped in green, then with red embroidery floss I tied French Knots to create berries. Stamped the sentiment, rounded the corners and attached the stamped panel to the card base.

Thanks for stopping by today, hope you have a great start to your week!

Maile


Merry Christmas And A Happy New Year: (All PTI unless noted)

  • Stamps: Beautiful Blooms & Signature Christmas
  • Ink: Ripe Avocado & Dark Chocolate
  • Cardstock: Ripe Avocado & White
  • Accessories: Embroidery Floss & Corner Rounder

Tuesday, November 24, 2009

Embellish Color Challenge With Brads

Hello! The latest Brad Challenge over at Embellish really through me for a loop, I am not used to working with such bright colors. Definitely a step out of my comfort zone.So combining these colors with sweet Emma's Sketch Challenge #4, here is what I came up with...
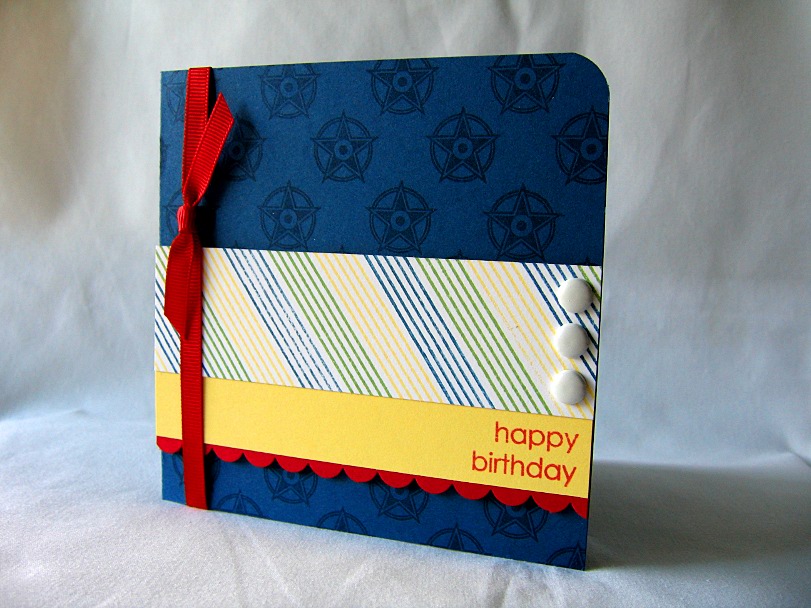
The white strip was stamped using stripes from Background Basics: Retro and the star background is from BG Basics: Stars. I really like these stars and I haven't used them in a long time, I find them hard to work with sometimes. I think I may challenge my self to use the stamp set more often.

Thanks for dropping in, hope you enjoyed your visit today!

Maile


Happy Birthday: (All PTI unless noted)
  • Stamps: Background Basics: Retro & Stars & Shapes By Design (Sentiment)
  • Ink: Enchanted Evening & SU Real Red, Barley Banana & Wild Wasabi
  • Cardstock: Enchanted Evening, White, Pure Poppy & SU Barley Banana
  • Accessories: SU Real Red Ribbon, MM White Brads, SU Scalloped Edge Punch & Corner Rounder

Friday, November 20, 2009

EBTKS Sketch Challenge #1

Hello There! Over at the Everything But The Kitchen Sink blog there having their first sketch challenge. What a great sketch, I just had to play along... Here is what I came up with...
I created the panels by adhering double sided sticky tape and then gave it a good coating of Doodle Bug Bon Bon glitter. For the center image I went with a tag to play along with the latest Inspire Me Challenge #4: Tag It, over at Dawn's blog.

Stamped the In Bloom flower in brown onto the tag and cream card stock, cut out the layers and adhered with dimensional adhesive. Tied a tab of ribbon, embellished with a little more glitter and attached a sentiment.

On the camera front, I received an email today that it has been repaired and has been shipped back to me. Hurray!

Well, thanks for stopping by today!

Maile


Always: (All PTI unless noted)
  • Stamps: In Bloom & Heart Prints (Sentiment)
  • Ink: Dark Chocolate & Spring Moss
  • Cardstock: Dark Chocolate, Vintage Cream & Spring Moss
  • Accessories: Dark Chocolate GG Ribbon, Twine, Doodle Bug Bon Bon Glitter, Creative Memories Tag Punch & Corner Ronder

Wednesday, November 18, 2009

Enjoy the ride

Hello all! I am on my way out the door but I wanted to pop in a share a fun sort of masculine card with you before I go... The background was stamped with stripes from Background Basics: Retro in Ocean Tides and Spring Moss. Rounded the corners and wrapped it with ribbon.
Stamped the bike in brown and attached the buttons with some fun stitching. Attach a brown scalloped edge, rounded the corners, and attach to the striped background making sure to hang the scallops over the edge for a tad bit of interest. All these rounded corners make me happy, it's such a simple touch but really makes for and fun card.

Hope you have a blessed day!

Maile


Enjoy The Ride: (All PTI unless noted)
  • Stamps: Everyday Button Bits & BG Basics: Retro
  • Ink: Ocean Tide, Spring Moss & Dark Chocolate
  • Cardstock: Kraft, Vintage Cream & Dark Chocolate
  • Accessories: Spring Moss GG Ribbon, Ocean Tides Vintage Buttons, DMC Floss, SU Scalloped Edge Punch & Corner Rounder

Thursday, November 12, 2009

Moxie Fab Plum Crazy

The latest challenge over at the Moxie Fab World Blog is to create a project that captures the essence of the color plum in its design. So here is what I came up with... The focus of the card is this handmade purple/plum flower. I decided to enhance the color by combining it with a triadic color scheme (three colors that are evenly spaced on the color wheel).
To create this flower I used three different sized circles punches, punched four circle from each punch and crumpled to distress. Adhered same sized circles together to form the layers then adhere the layers together to form the flower. Embellish with a stitched button in the center and attach hand cut and distressed leaves.

Thanks for visiting and hope you have a wonderful day!

Maile


Wishing You A Happy Birthday: (All PTI unless noted)
  • Stamps: Background Basics: Retro & Everyday Classics
  • Ink: Versamark & Su Perfect Plum
  • Cardstock: Kraft, Melon Berry, Spring Moss, Vintage Cream & SU Perfect Plum
  • Accessories: Cream Vintage Button, DMC Cream Embroidery Floss, Coluzzle Circle Cutter, Marvy Uchida Circle Punches

Saturday, November 7, 2009

Here To Give You A Lift

Hello all! Hope you are having a great start to your weekend. My sister was kind enough to let me borrow her camera for a bit, so I have a new card to share with you today...I have had this felt cloud idea in my head since I made this card. I created today's card pretty much the same way. I cut cloud templates from cardstock and found it easiest to hold the template against the felt and then cut out the shape. I then laid out and overlapped the clouds, adhered them with Scor-Tape and trimmed the edge. The left side of the card is covered with Scarlet Jewel cardstock and an embossed curves punched edge (stamped with polka dots in Melon Berry) then wrapped with a melon berry bow.
I thought Melon Berry and Scarlet Jewel hot air balloons (from Everyday Button Bits) would be fitting floating among these fluffy clouds.

Thanks to all of you for putting up with me not having my camera and for all of your sweet and encouraging comments. Have a great weekend!

Maile


Here To Give You A Lift: (All PTI unless noted)
  • Stamps: Everyday Button Bits & Polka Dot Basic II
  • Ink: Melon Berry, Dark Chocolate & Scarlet Jewel
  • Cardstock: White, Spring Rain & Scarlet Jewel
  • Accessories: Melon Berry & Scarlet Jewel Vinage Buttons, White DMC Embroidery Floss, White Felt, Melon Berry Satin Ribbon, Marvy Uchida Circle Punch, EK Success Embossed Curves Border Punch & Corner Rounder
 
BLOG DESIGN BY: SHERBET BLOSSOM DESIGNS