
I’ve been having fun exploring a technique I have recently discovered. It all began by adding a touch of color using ink pads applied directly to the edges of white cardstock. Drawing inspiration from this previous project...
This then transformed into using a watermark ink pad/pen and embossing powder to coat edges.

It adds such unique touch to a project check it out...

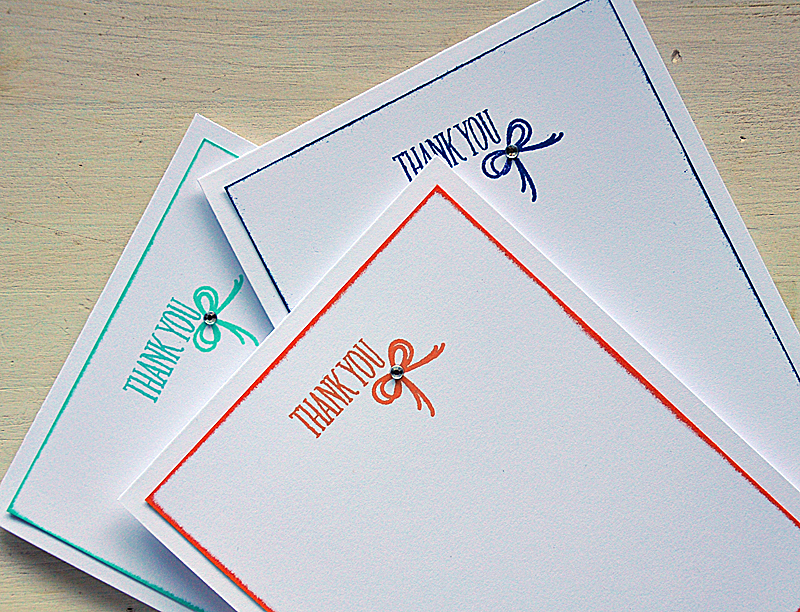
After stamping the sentiment onto the cardstock strip I heat set a colorful border. Here's How: Using gentle pressure, rub/drag the edge of cardstock across the top of a Versamark ink pad. Holding the paper at a slight angle and draging for a thick build up (I'd say at about a 45 degree angle dragging towards yourself). Coat with embossing powder and heat set.

It adds a nice colorful and glossy touch. Just A Note: The twine was attached into place using a Tiny Attacher and then tied into a bow.

The easiest way to apply this technique is using the ink pad, but to take it up another notch, I used my handy dandy Embossing pen. Same idea as the ink pad, giving you a sticky surface to work with, but in a free hand pen form.

Here's How: After die cutting the desired shape (here I've used a Bountiful Banners die cut) I simply traced along the edge with the pen, covered in embossing powered and then heat set. I love how it helps this simple white banner to pop! Here's A Tip: I found it easiest to emboss one side of the banner at a time, this way I had a place to hold onto.

For this last card I pulled out my Chevron Stripes Border die and the embossing pen. Here's A Tip: When covering a larger/longer surface, work with one small area at a time, working your way gradually to the end. This ensure the watermark ink will remain sticky enough.

That's it from me today. I hope you'll give this look a go. Have fun!
Maile
Thank You Card...
Thank You Card...
Blooming Hello There Card...
Chevron Hello There Card...


Super fun technique...it adds such a nice pop of color!!
ReplyDeleteThis is really super cute! I love this idea and love the look. Your cards are beautiful!
ReplyDeleteSusie
All of the new embossing powder colors will give this a fresh new look. I've used the technique before, but only with silver or gold. Thanks for the beautiful sample projects and the tips for making it all easier!
ReplyDeleteVery cool. Thanks for the idea and the tips.
ReplyDeleteGreat idea! Will have to try this out!
ReplyDeleteHi Maile! Love these! I gotta try this! Thanks!
ReplyDeleteSUPER IDEA MAILE!!!!!! :) AND THANK YOU for showing us the little "attacher!" LOOKS LIKE another tool to add to my WISH LIST!!!!!! :)
ReplyDeleteThis is such a neat technique! LOVE all your cards!
ReplyDeleteWhat a creative idea! Thanks for sharing...love it!!
ReplyDeleteNice work w/this technique! I used to use my embossing pen but mostly on sentiments. I will have to try it on edges. :)
ReplyDeleteHow cool!! Such a creative technique, love it!
ReplyDeleteFantastic cards, of course, but also really appreciate your tips (the double embossing reminder, and tying a bow with the tiny attacher ... brilliant!!)
ReplyDeleteLuv.
ReplyDeleteGreat idea! I'll definitely be giving that a try...
ReplyDeleteSuch a super technique! I will be giving this a go. Thank you and beautiful projects!
ReplyDeleteThis is such a neat effect! More reasons to get some colored embossing powder!
ReplyDeleteWow, this is cool. Love the way is shines. Thanks for the tips.
ReplyDeleteWhat a great idea! I'll have to try this! :)
ReplyDeleteI did this some years ago and liked it, but then forgot it with other fun techniques coming out all the time. Thanks for the great reminder. Your projects are lovely.
ReplyDeleteBrilliant!
ReplyDeleteMy name is Colleen - I'm not set up with the other ID's. I looked for the Bountiful Banners die set and it's out of stock. Will it be restocked?
ReplyDeleteVery cool! I really like the effect on the layered chevrons!
ReplyDeleteawesome! love the technique with the embossed powder!
ReplyDelete-Rachel w k
rwkrafts.blogspot.com
OMG that chevron card! Only you would think of that. Brilliant.
ReplyDeleteSimple and eye popping! I like this...makes me want to experiment too.Thanks for sharing.
ReplyDeleteLove the look this technique creates, Maile. Thanks for the fun idea :)
ReplyDeleteBeautiful cards Maile! I can't wait to try this technique!
ReplyDeleteVery nice!
ReplyDeleteI used to emboss edges a lot, but haven't done it much lately & never just a single edge. Thanks for the inspiration, Maile! Love your cards, as always!
ReplyDeleteWhat a great idea, Maile! Love the pop of color ~ anxious to try this.
ReplyDeleteLove this touch - it makes for a great detail accent! Thanks for the inspiration, Rx
ReplyDeleteclever, clever, clever!!!
ReplyDeletethis is a great idea...... awesome technique u have come up with... thanks.... gonna try it today...
ReplyDeleteBeautiful cards, to highlight this brilliant technique - thank you :)
ReplyDelete